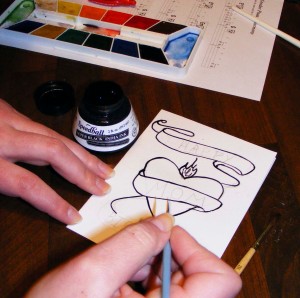
Today is my mother’s birthday. I could go on about the tree of life and how I am glad she was born and that I was born and so on, but I think I’ll cut right to the point. 1) Mothers love it when we make stuff for them. 2) One of my many pursuits is handmade greeting cards. One plus two = a hand-made birthday card for my mother. Since many of the people who have seen my cards have asked about my process, I thought I’d share it here.
I devised this process partially out of common sense and partially from what I know about how comics are made. First, of course, you need a design for the card. My cards typically make use of classic tattoo inspired designs, particularly text ribbons. So what better choice than a heart with “MOM” written on it? Step one is the basic drawing.  From there, I trace over the pencil using india ink. Sometimes I use on old-fashioned ink calligraphy pens where you have to constantly dip the nib in the ink, and sometimes I even use a fine-tip Sharpie. Today, since I was only making one card, I chose to just use a fine paintbrush for the ink.
  Which leaves me with something like this.
  The nice thing about this process is that it is forgiving. You can essentially re-draw anything that you don’t like with the brush. Once it is dry, I erase the pencil lines, then go back in with the brush to add some dimensionality and depth (in comics they call it spotting the blacks).
  The last step is to add color. Although I do sometimes stop with black and white, I really think color is the fun part. I typically paint these with watercolors. The nice thing about india ink is that once it is dry, it is not water-soluble, so I can be pretty careless with the watercolor. A good heavy line of India Ink creates a very subtle resist and helps keep the colors in line.
 See what a difference color makes? Before, it read as “Happy Mom Birthday,” but by alternating colors, the “Happy” and “Birthday” are connected and “MOM” stands out. In retrospect, I probably should have stopped here, but I got a little carried away on the birthday ribbon and got out of the lines, so I decided to add a background color.
 A few minutes with the hair dryer later, and here we are. It’s probably not the most beautiful card I have ever made, but what mother could resist? Well, definitely not mine.
Love you Mom!

Now that the detailed process is revealed, I completely understand why you have no desire to create mounds of these.
It cuts down on the process a little when I make a bunch at one time, versus one at a time. For example, once I get one design that I like I can pencil in on 4 more cards much more quickly than it takes to draw it the first time. But you are right, they are still very time consuming!